Blog
RF 100mm 2.8 L Macro vs EF 100mm 2.8 L Macro
13 May 2022
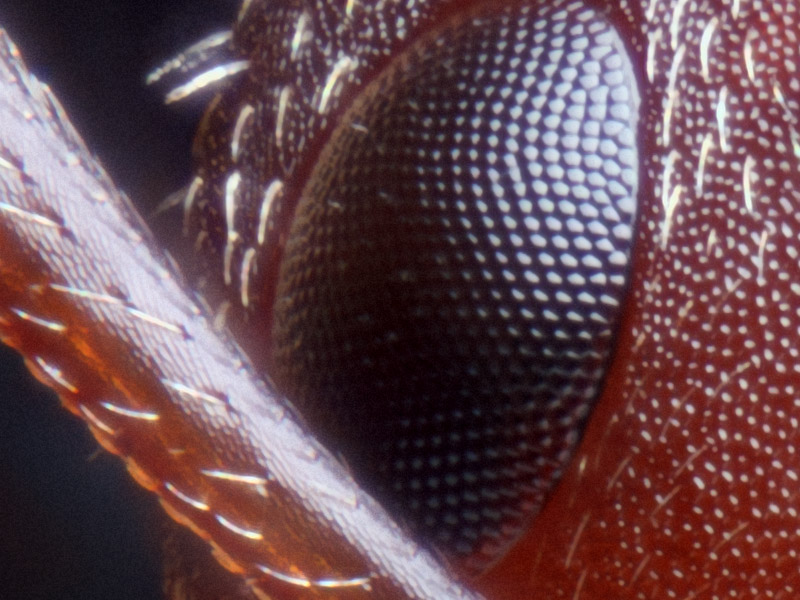
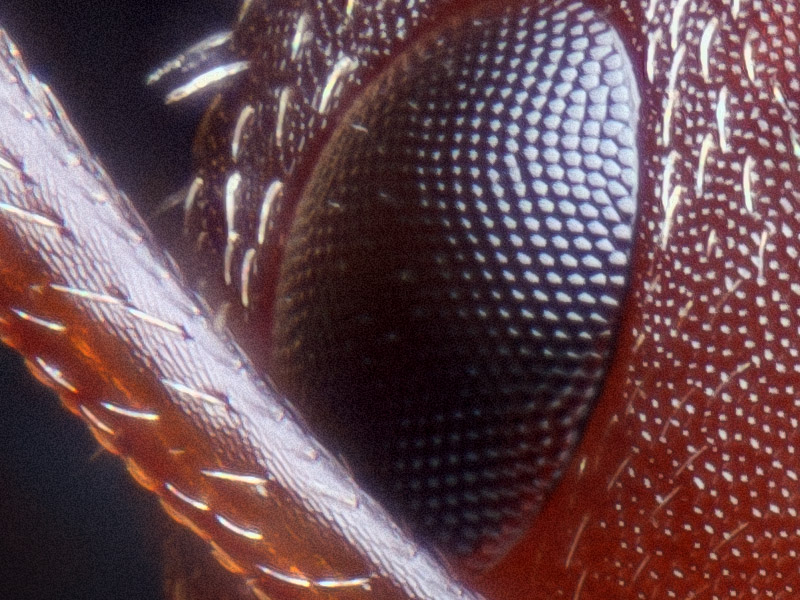
In this post, I am comparing the Canon RF100mm F2.8 L MACRO IS USM and the Canon 100mm f/2.8L Macro IS USM. I will be evaluating the lens sharpness at macro magifactions for 1:1 for both the RF and EF lens, and 1.4:1 for the RF version. Chromatic aberration, vingetting, and field curvature were not evaluated.
Test setup
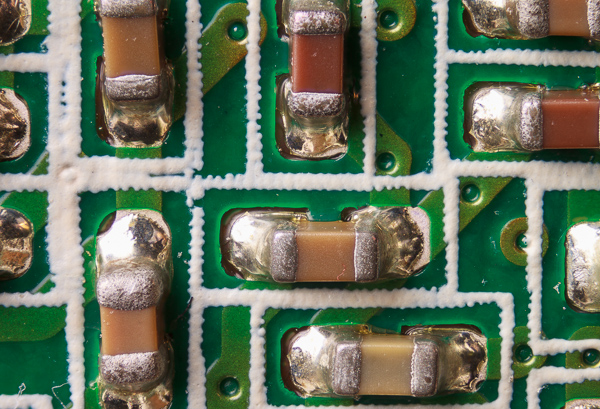
Lenses were tested using slanted edge MTF. A sharpened and flame blackened razor blade was imaged using a Canon R5. For the RF 100mm, the SA control was locked to the zero position. Focus stacking was employed to eliminate any potential field curvature or misalignment. Although both of these lenses can be focus bracket using internal focusing, and external rail was used for for obtaining the focus stacks to avoid shifts in magnification. Finally, all completed focus stacks were evaluated using MTF Mapper. Three samples were taken and averaged for the center and upper left corner of each image. Results represent the MTF50 of the lens in line pairs per millimeter.
I would however, not consider this an absolute figure since the camera used, image processing, test target, and evaluation model all contribute to this final value. Values therefore should only be used for relative comparison inside of this test.
Results

Some interesting results to note. First at 1:1 magnification, the EF100mm is a little bit sharper in the center, and much sharper in the corners at f2.8. That changes right away when stopping down to F3.5, with the RF100mm becoming much sharper in both the center and corners. At 1:1 magnification, the RF100mm appears to be sharper than the EF100mm at all tested apertures except F2.8.
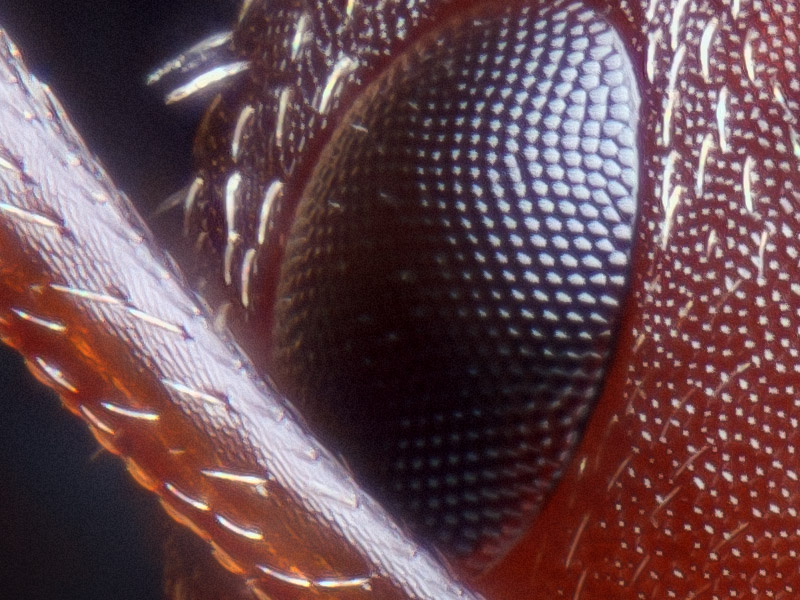
Looking at the RF100mm at 1.4:1 magnification, the resolution drops slightly as I would have expected. However relative to the EF100mm at 1:1, its resolution is very close to matching it when stopped down, for the advantage of 40% more magnification.
Additional lens data
My conclusion is, the RF100mm appears to exceed the EF100mm in sharpness, magnification, and gimmickyness(spherical aberration control). The Working distance is slightly lower, but I have not noticed the difference is actual usage.
Addendum: all though I did not take the time to quantify chromatic aberrations of each lens, the axial CA in the test images to be noticeably lower in the RF100mm, at least to my inbuilt bio-cameras. I may at a later date test the CA of each lens if it is important to anyone.
Automating EOS Utility with Apple Script Editor
19 July 2017
Every once and a while I have the need to focus stack a slightly larger object than my normal macro lenses will allow. In these situations I will just use a normal lens mounted on my camera, sometimes with a diopter on top. This can become both a blessing and a curse. A blessing because turning the lens focus ring is normally better than moving the whole camera. A curse because that means I shouldnt use Focus Stepper.
While there are a few paid solutions for stepping focus automatically with the camera's auto focus, I have found it more reliable to script EOS Utility to do it.
To beguin we just need to open up the Script Editor, EOS Utility, and finally UI Browser, The trial version works well enough for our needs, and can be found at http://pfiddlesoft.com/uibrowser/ . Apple also provides an Accessibility Inspector, but scripting with AX elements can be finicky some times, so we'll avoid that. When you first launch UI Browser, you need to go to System Preferences > Security and Privacy > Privacy > Accessibility and select it to allow it to control your computer. You also will need to do the same thing with Script Editor.
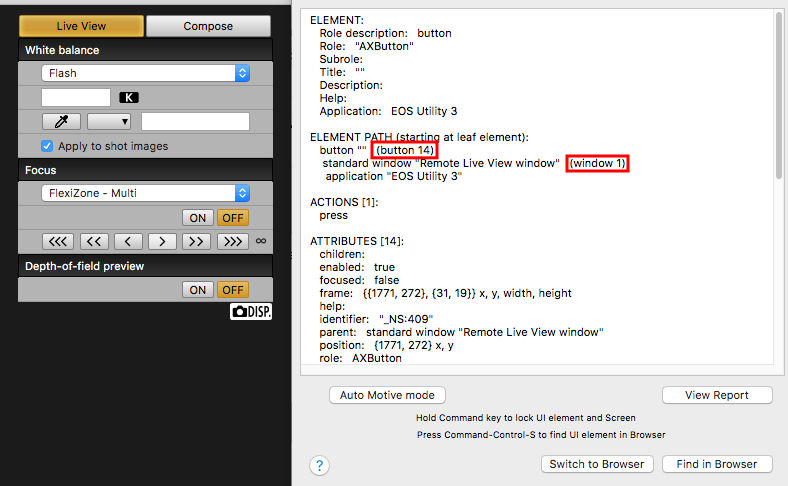
With everything open and running, step one is to identify the UI elements we want to control. Click "Switch to Screen Reader" in UI Browser and hover over the focus buttons to get the button names and the window.
Now that we have the information we need, we can start scripting.
Ill start by making a dialog that lets me set the number of images and which focus button to use. Since I only ever shoot front to back, I wont worry about the reverse focus buttons.
set repeatNumber to text returned of DIALOG_1<br />
set btnPress to button returned of DIALOG_1<br />
delay (6)
With the dialog out of the way, we can do the actual work. We will take the repeatNumber we set in the dialog and repeat out action this number of times.
repeat repeatNumber times
Then we need to make sure EOS utility is in focus using the activate command. I do this in the loop so that incase I accidentally click away from EOS Utility while the script is running, it will switch back when it needs to. Next we take out first photo before we step focus. The space key takes an image in EOS Utility, so I use that keystroke instead of fiddlign aroudn with the shutter button in the UI. Finally a short delay to let the camera to do all its mechanical stuff.
activate application "EOS Utility 3"<br />
tell application "System Events" to tell process "EOS Utility 3" to keystroke " "<br />
delay (2)
Now To step focus based on what we pressed in the dialog. There are a few options for doing this, but I ended up putting the elseif inside of the loop. A smarter person in less of a rush would have added the elseif before the loop and assigned the result to a new variable. Then used that variable inside the loop. It aint scripting if your doing it right 😉 Then a small delay. This is so we have a short rest period between when the lens moves and when the shutter fires.
tell application "System Events" to tell process "EOS Utility 3"
		if btnPress = "Fine" then
			click button 14 of window 1
		else if btnPress = "Medium" then
			click button 11 of window 1
		else if btnPress = "Course" then
			click button 12 of window 1
		end if
	end tell
	delay (0.75)
End our loop
end repeat
And let us know that the script has completed
display dialog "Complete" buttons {"OK"} default button 1
Improvements you can make!:
- User specified number of times to move the focus before each image
- Put the button selection loop in a intelligent place
- Allow the user to cancel the dialog
Or if you are even lazier than me, you can download the script HERE
Sensor-Film review
28 May 2014
Cleaning my camera sensors is not something I care for. It is a bit of a chore and can be costly in the case of solutions like sensor swabs. Though I can never solve not wanting to clean my sensor, I can try and find alternate methods for sensor cleaning that are effective and cost efficient.
Sensor-Film is a paint on polymer made mostly out of PVA. It is water soluble and as such will only be able to clean debris that is not oily. If there is grease or oil on the sensor, it will need to be cleaned with a solvent like methanol. Sensor-Film comes in two different types, one for sensors who's AA filter is fluoride coated and one for AA filters that are not. Since I have a Canon 500d(uncoated AA filter) and a Canon 60d(coated AA filter), I decided to try both.
A video of the instructions Sensor-Film gives you for its usage can be found HERE. A few points I would like to add to this video. First, the little pieces of rip resistant paper included do not work. Having tried the paper several times, it just tears soon as you try to peel the film off. I would recommend using a piece of a fabric ribbon like what is used for decorating gifts, or something similar. Second, the dry time is on the longer end of what is stated. Close to 2 hours, plus 30 minutes to an hour for adding the tab. Finally, the film does not come off as easy as shown in the video. It adheres to the sensor and requires fair amount of force to pull off.
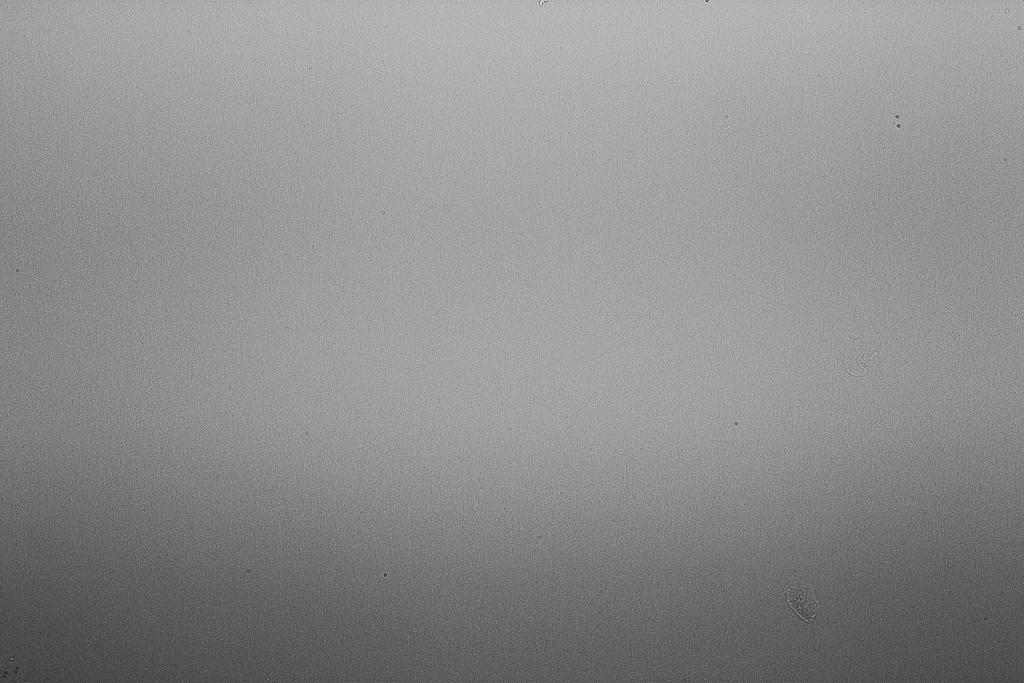
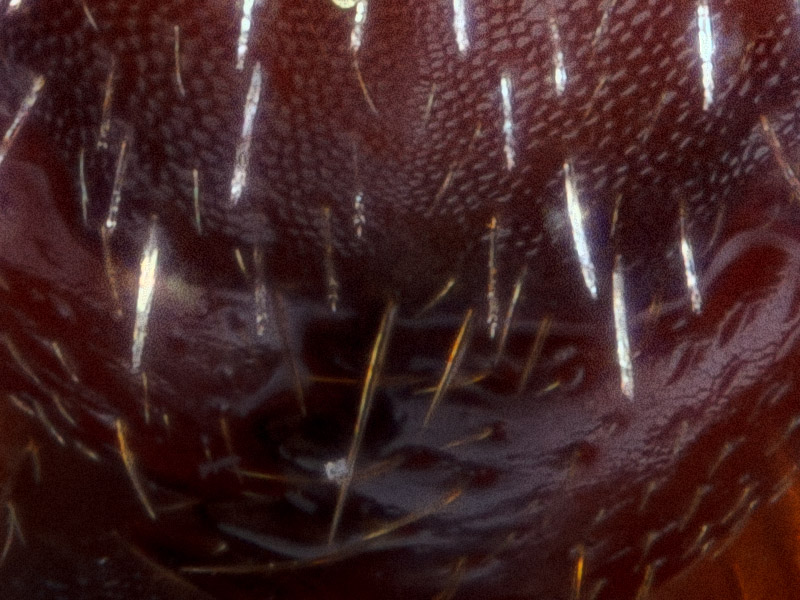
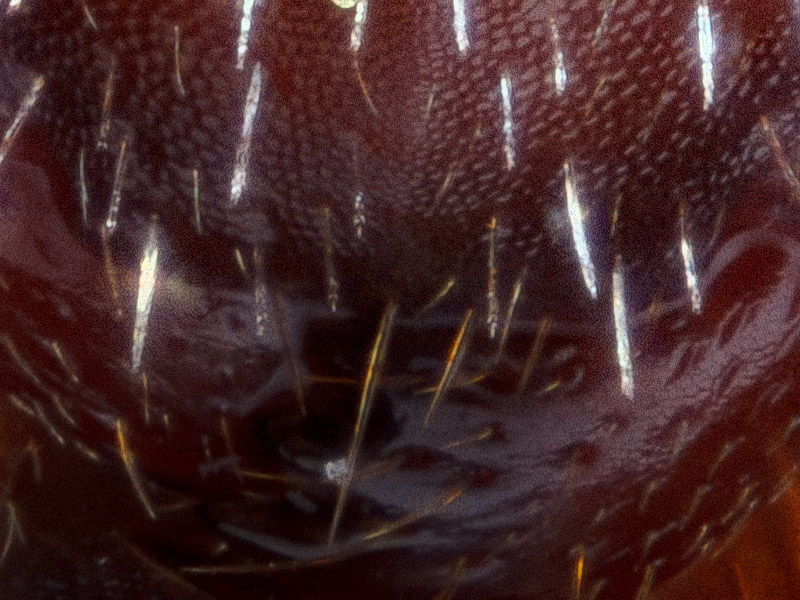
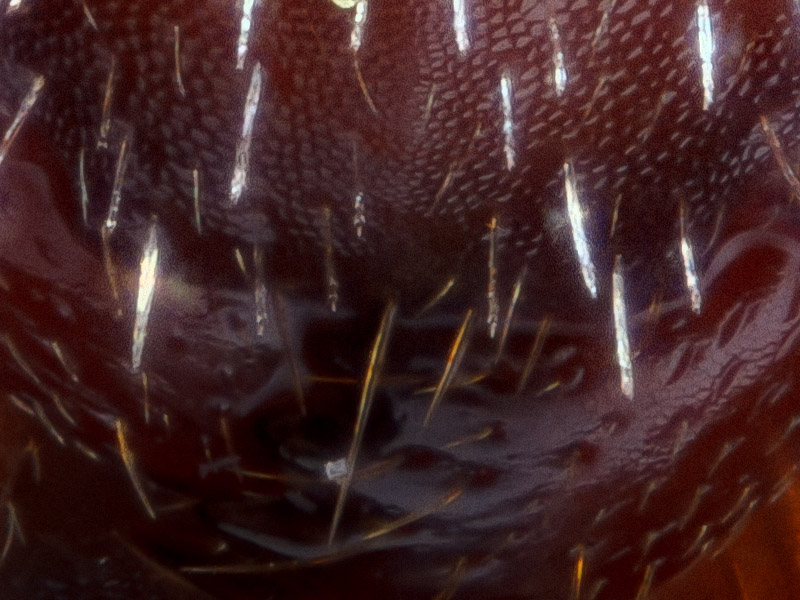
This is my second time using Sensor-Film. The first time went without much issue, other than learning that the included paper tears rather easily. The following images are from my second and most recent experience with it. The pictures were taken at ~F114 and enhanced to make dust more visible.
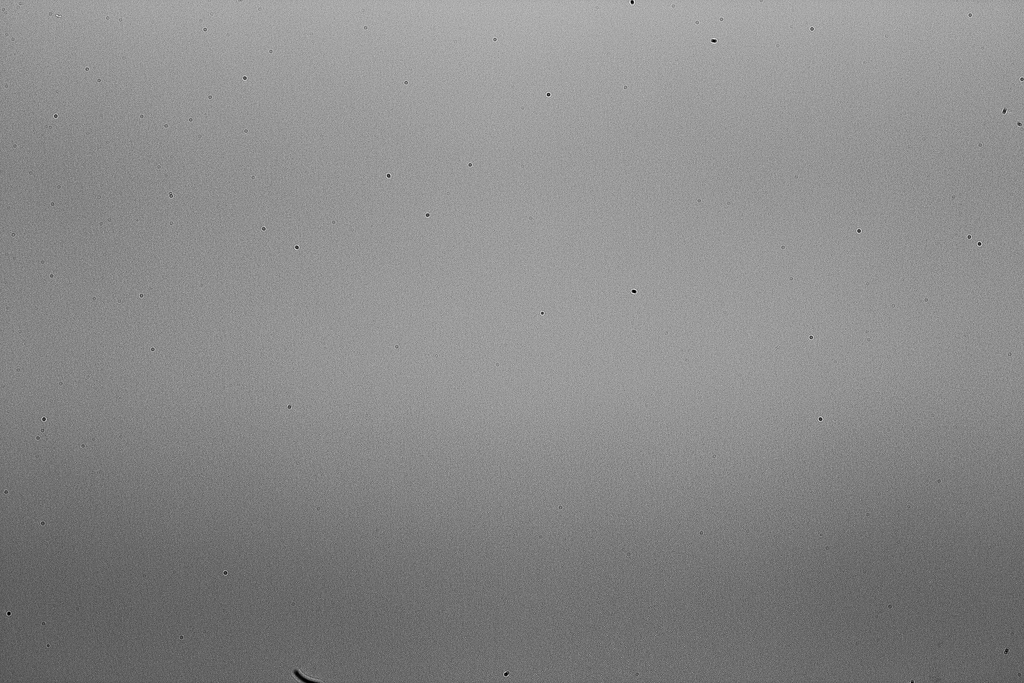
With the 60d and the fluoride Sensor-Film everything went about how I would expect. The film painted on and peeled off fairly easily. I noticed some smudge like spots in the image that I did not notice on the sensor. Running the cameras sensor cleaning feature two times cleared the issue. I can only guess that they were some small flakes that were weakly adhered or clinging to the sensor due to static. A few spots were not cleaned up. I think that I might have not painted all the way to the top of the sensor to retrieve the hair looking object on the bottom of the frame.
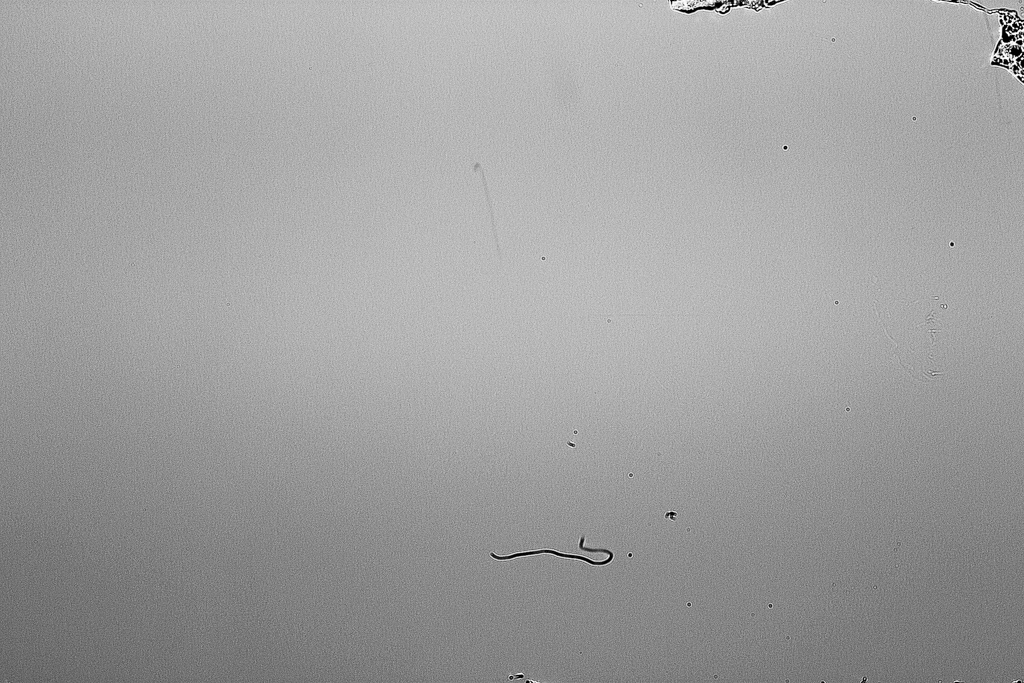
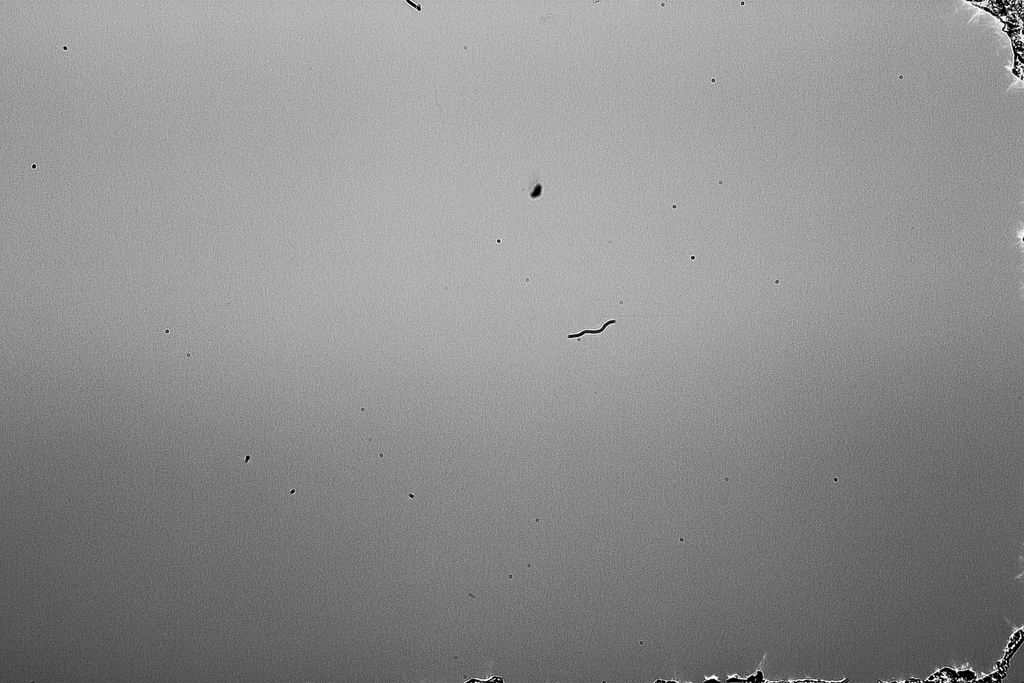
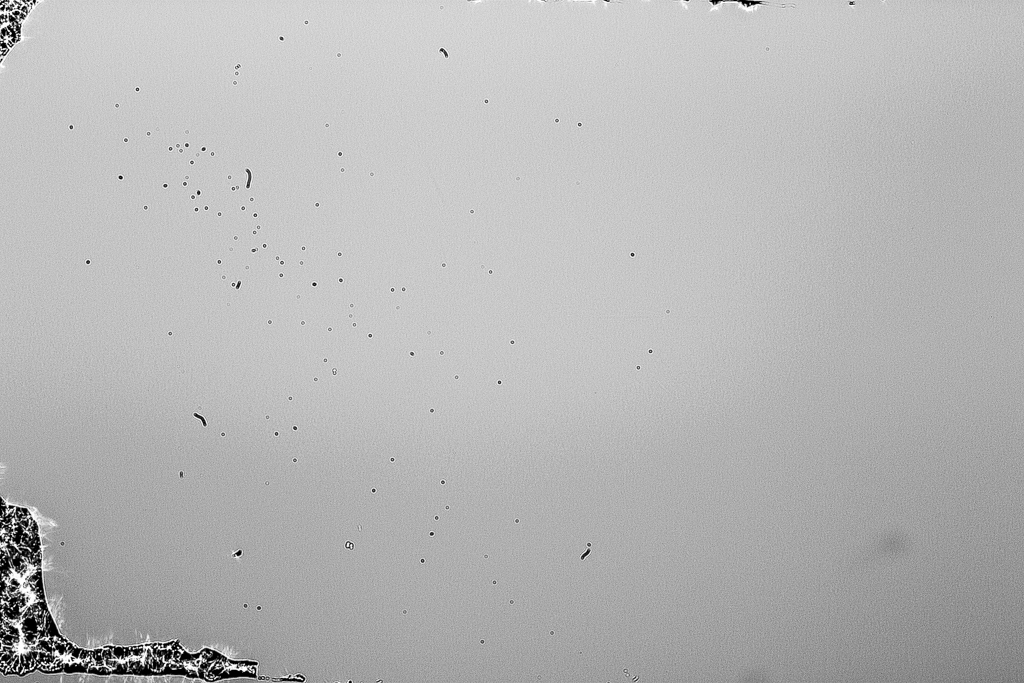


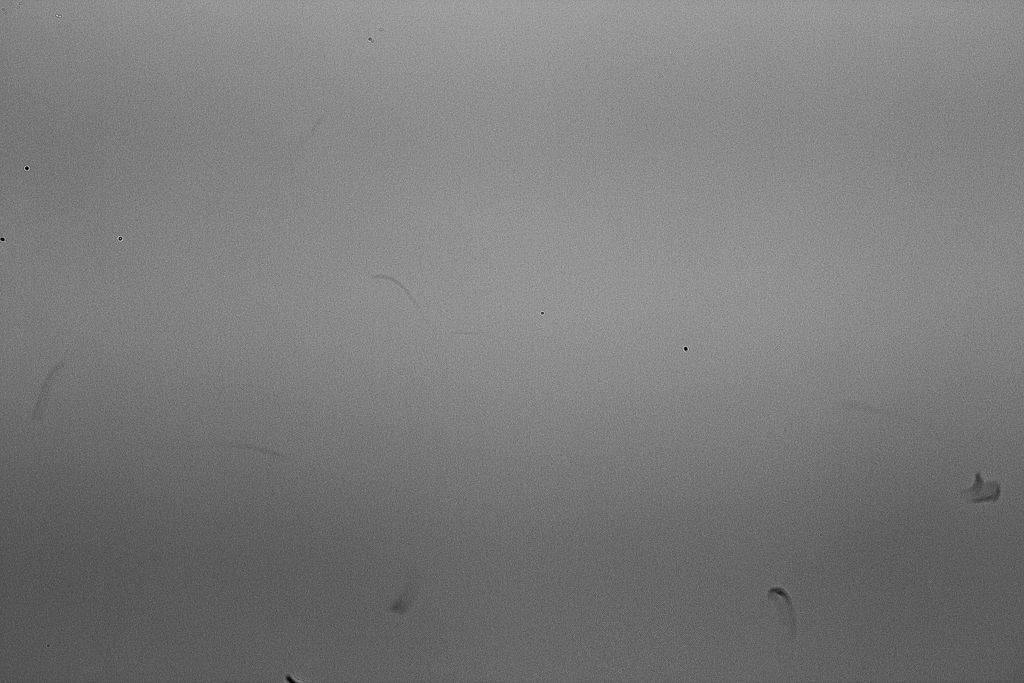
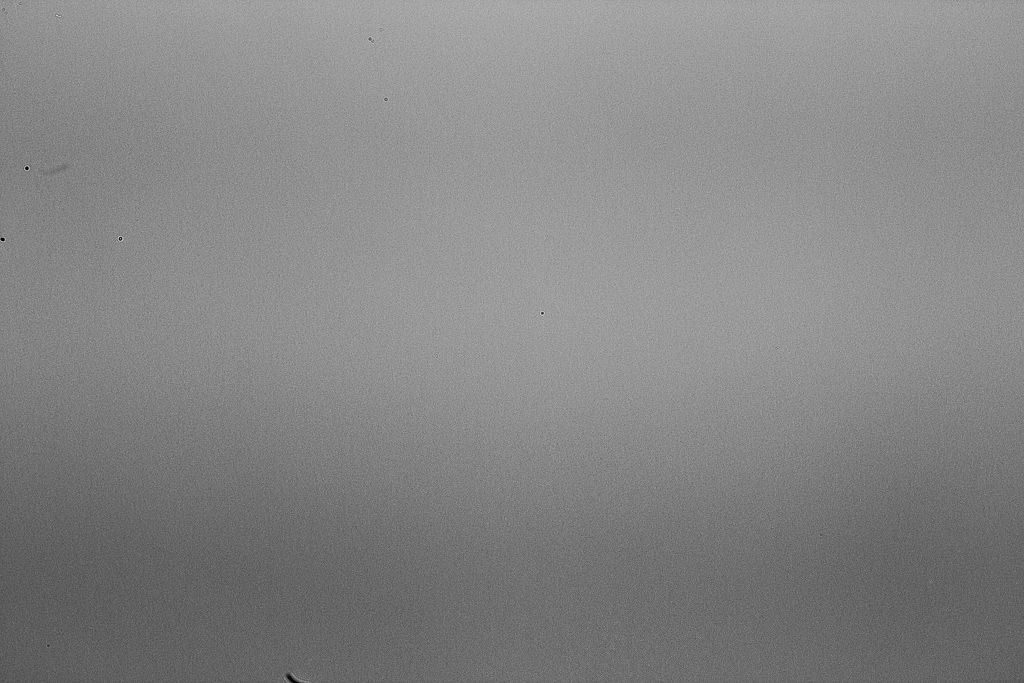
Things grew more complicated with my 500d this time around. I should point out that the before picture is how the sensor was left since its last cleaning with Sensor-Film. During this cleaning cycle the film would tear near whichever edge it was peeled from. The first application was well within the sensor bounds. By the sixth time think I had gotten a little bit sloppy and might have got a bit close to the edge of the sensor. I omitted taking photos of the 4th and 5th applications because the results were the same as the other attempts. By the sixth time round I got tired of trying to reapply and peel it off in one piece, so I took some Crown denatured alcohol(which is about 75% methanol according to the msds) and a few spun cotton swabs to wiped it down. The alcohol worked well to clean up everything. I should note here that the denatured alcohol did leave a white residue if I put a lot of it on the sensor and let it evaporate. However if the swabs were just a little bit moist, it cleaned up the residue and left no other residue behind. In the future I may try some cheap lint-free swabs and denatured alcohol as an inexpensive cleaning method.
In the end, my 500d sensor is a little bit less clean than the last time I cleaned it with Sensor-Film. Why I have had this discrepancy in usage I do not know. Meanwhile the sensor on my 60d is quite a bit cleaner. This more closely mirrors my previous experience with using Sensor-Film. For the time being, I think I will have to reserve my judgement on the normal version of Sensor-Film until I have had a chance to try it a third time. The fluoride version seems continue to work well.
Deflicker images for focus stacking with Magic Lantern and Lightroom
26 April 2014
I have a portable flash that is…unreliable. The net result of this is a change of exposure and color temperature between images when focus stacking with it. These subtle differences can cause brightness banding and color banding in a completed stack. While Zerene Stacker can compensate for changes in exposure, it still leaves shifts in color, and for larger shifts in exposure(I have seen up to 1EV for my sigma610) I find it better to correct the problem in RAW before converting to TIFF.
The current build of Magic Lantern includes a deflickering module. When enabled this will examine the image and write an .xmp(Lightroom or Adobe Camera Raw) or .ufr(UFRaw) sidecar file which can be read by RAW software to offset the exposure value.
First enable the post deflicker module and file manager module in Magic Lantern.
Next we make sure that image review is turned on(2 seconds should be fine). When the image review screen pops up, Magic Lantern will use this to analyze the image and create the sidecar file.
Finally we set up the module. Since I will be using Lightroom, I set it to XMP. Deflicker percentile is what part of the image it will use to deflicker. Deflicker target level will be the offset for the values. We will want to take a couple test shots to try and get it as close to 0 as we can.
In the file manager, you can view the XMP file and check what the exposure value it will set will be. If your image is close to correctly exposed you will want to have the exposure2012 value as close to 0 as you can manage by adjusting the Deflicker target level.
At this point you are ready to shoot your sequence.
Once you are done, import into Lightroom as usual, and it should automatically import and read the XMP sidecar files. Now images have been deflickered from any changed in exposure. It is important now not to modify the exposure slider inside of Lightroom. When copy and pasting settings or syncing settings make sure that "Exposure" is unchecked, since values will be applied absolutely. Now to fix the slight shift in color temperature we set the white balance to auto on all photos by either copy and pasting settings or syncing the settings. When looking at the develop settings for each photos you should now notice difference values for exposure and color temperature across the series of images, and everything should appear uniform in brightness and color.
The white balance may not be set at what you want and the exposure values might not be exactly where you desire. Since Lightroom can not offset values relative to their current value, we have to do this some other way. Luckily it isnt very hard.
Method 1: In Lightroom go to the Graduated filters and drag on out outside of the image, so that the whole image is effected by it and there is no gradient on the image. Then you can simply adjust the exposure and color temperature on the graduated filter. Once you are done, copy and paste the filter to all other photos.
Method 2: We need to install ExifTools. In Lightroom now, select your photos and go to Photos>Save Metadata to File while in the library module. This writes XMP files to the directory the images are in. Now you can open up terminal or command prompt and paste the following:
exiftool -Exposure2012+=+0.00 -WhiteBalance="Custom" -ColorTemperature+=+0 -Tint+=+0 -ext xmp /FolderToXMP
Where "+0.00" is, type the offset amount for your exposure value. If you want to subtract 1.2EV, then it should look like "-Exposure2012+=-1.2". The same goes for "+0" for Color Temperature and Tint. The "WhiteBalance" tag changes the dropbox in Lightroom from "Auto" to "Custom" so that the change to white balance will update as expected. Where "/FolderToXMP" is put the location to where the images are.
Now in Lightroom go to Photo>Read Metadata from File. Changes will now appear and value will be offset.
Using exiftool gives you another bonus you can do. You can write out the values to CSV and modify them or examine the values with a spreadsheet. The following command will give you a CSV with exposure, color temperature, and tint values.
exiftool -csv -Exposure2012 -ColorTemperature -Tint -ext xmp /FolderToXMP > /FolderToWriteFile/list.csv
For this image for example, I know the standard deviation for exposure is ~0.17EV with a color shift of 43.6K.
Lightroom Noise Reduction for Pmax Stacking
23 March 2014
One of the primary issues for Pmax stacking is increased noise in the resulting image. This happens from noise in each image being treated as detail and being added together in the final image. Increasing the signal to noise ratio for each prestacked image will help alleviate this problem.
Fortunately Lightroom offers many ways to do this. I decided to experiment with just reducing the noise of each image and sharpening them all at the same rate. The two main ways for accomplishing this are through adjusting the Sharpening>Detail value and the Noise Reduction>Luminance value. Below are Pmax images with the 'D' value being the detail value used and 'N' being the Luminance Noise reduction used. Images were taken at ISO 100


There are a lot of other settings in order to fine tune noise reduction and sharpening that I did not explore, because there are too many permutations to mess with. Instead this was just meant to give myself a quick overview of how these primary settings interact with Pmax stacking in order to give myself a range for fine tuning. After all, each camera and image produces different noise characteristics. The best setting for one set of images may not be the best for others. For this image, I find myself leaning toward the "D=30 N=30" and "D=60 N=60" images. With the "D=60 N=60" producing some minor noise reduction artifacts.
Stacking artifacts explored with CG images
19 March 2014
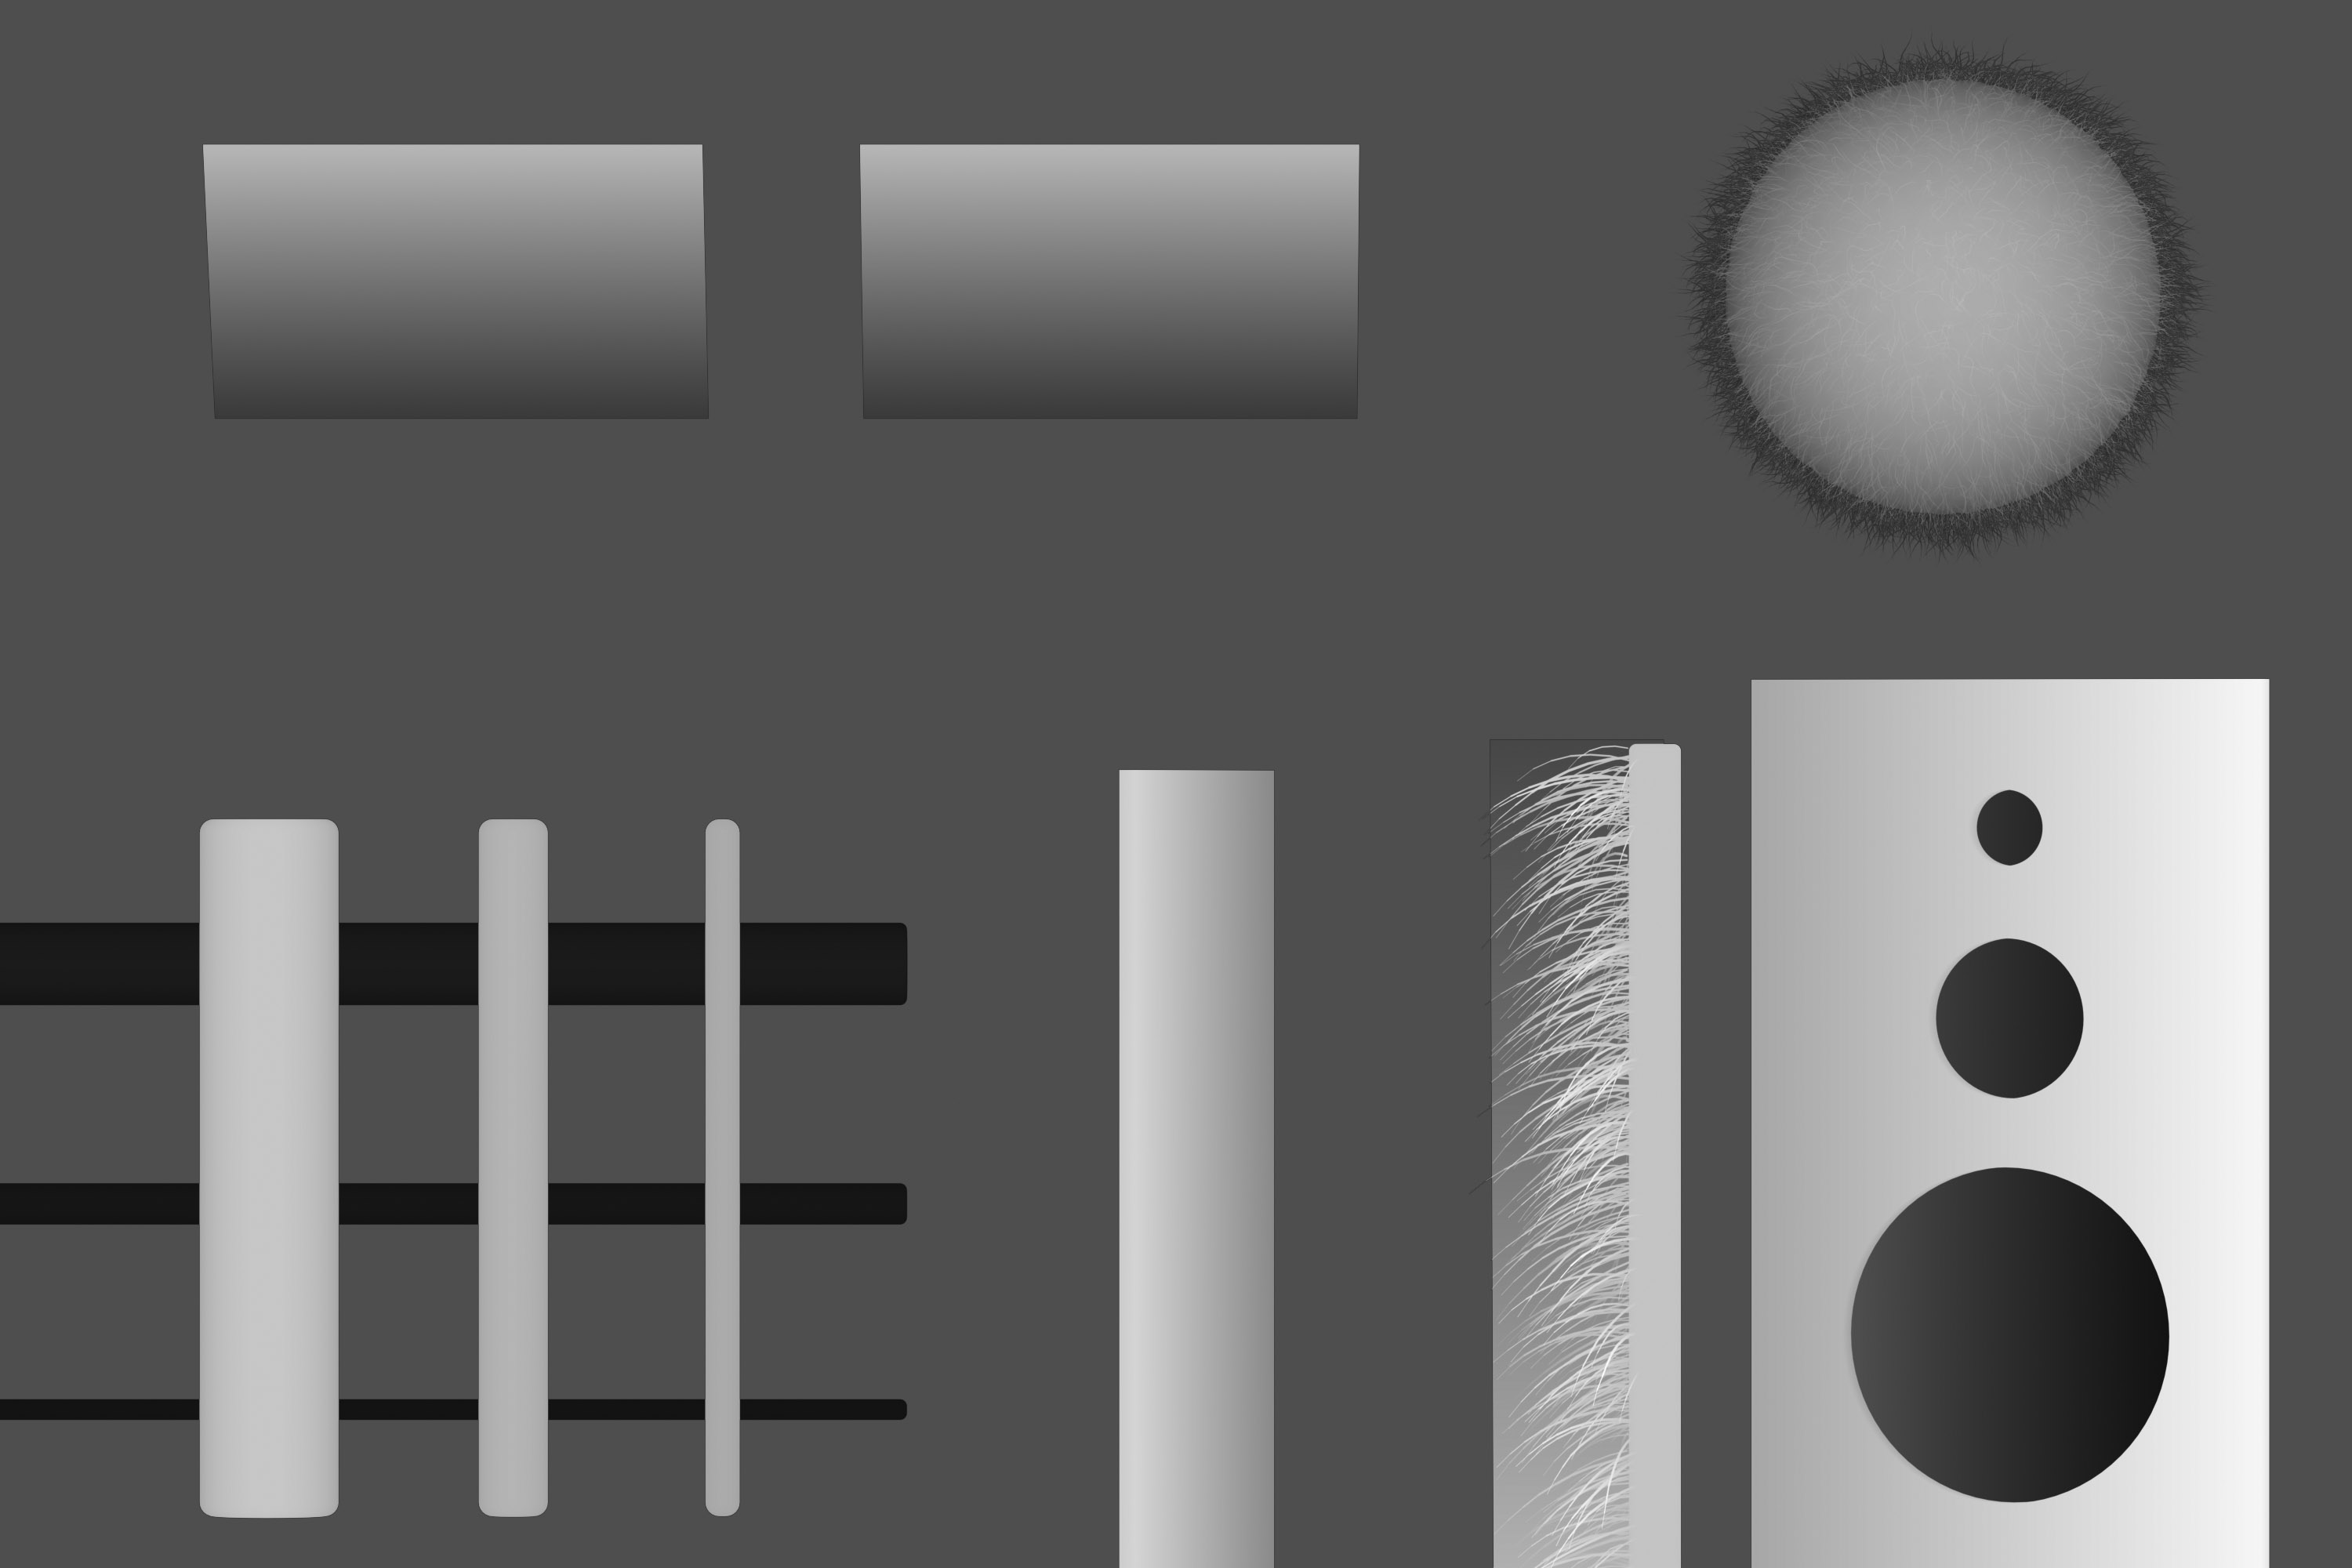
Often times I do image stacks where there are problematic artifacts that degrade the image quality. I became curious as what the artifact areas may look like compared to a perfectly clean image. So I decided to create a series of computer generated images to explore the common artifacts I tend to see.
The series of 42 images was rendered with a physically based sample based renderer. The simulated effective aperture used was F16.8 at a magnification of 5:1. Reproducing a DoF approximate what one might see with an MP-E 65 at F2.8 and 5:1 magnification. The effective focal length was at 200mm, not replicating what an MP-E 65's FoV is, due to a slip of my mind. However, the depth traveled for the test was not great and the difference in perspective is marginal.
The image consists of 6 objects that are meant to exhibit stacking artifacts. Image noise was added to the top left panel after the images were rendered by overlaying neutral grey photographs that were taken with my 60D and processed in Lightroom. This gives unique and realistic noise per frame and replicates what I experience on average for noise pattern and intensity.
Below you will find a comparison of the scene rendered without any depth of field effects(marked 'NoDOF') then several different image stacking outputs to compare to.
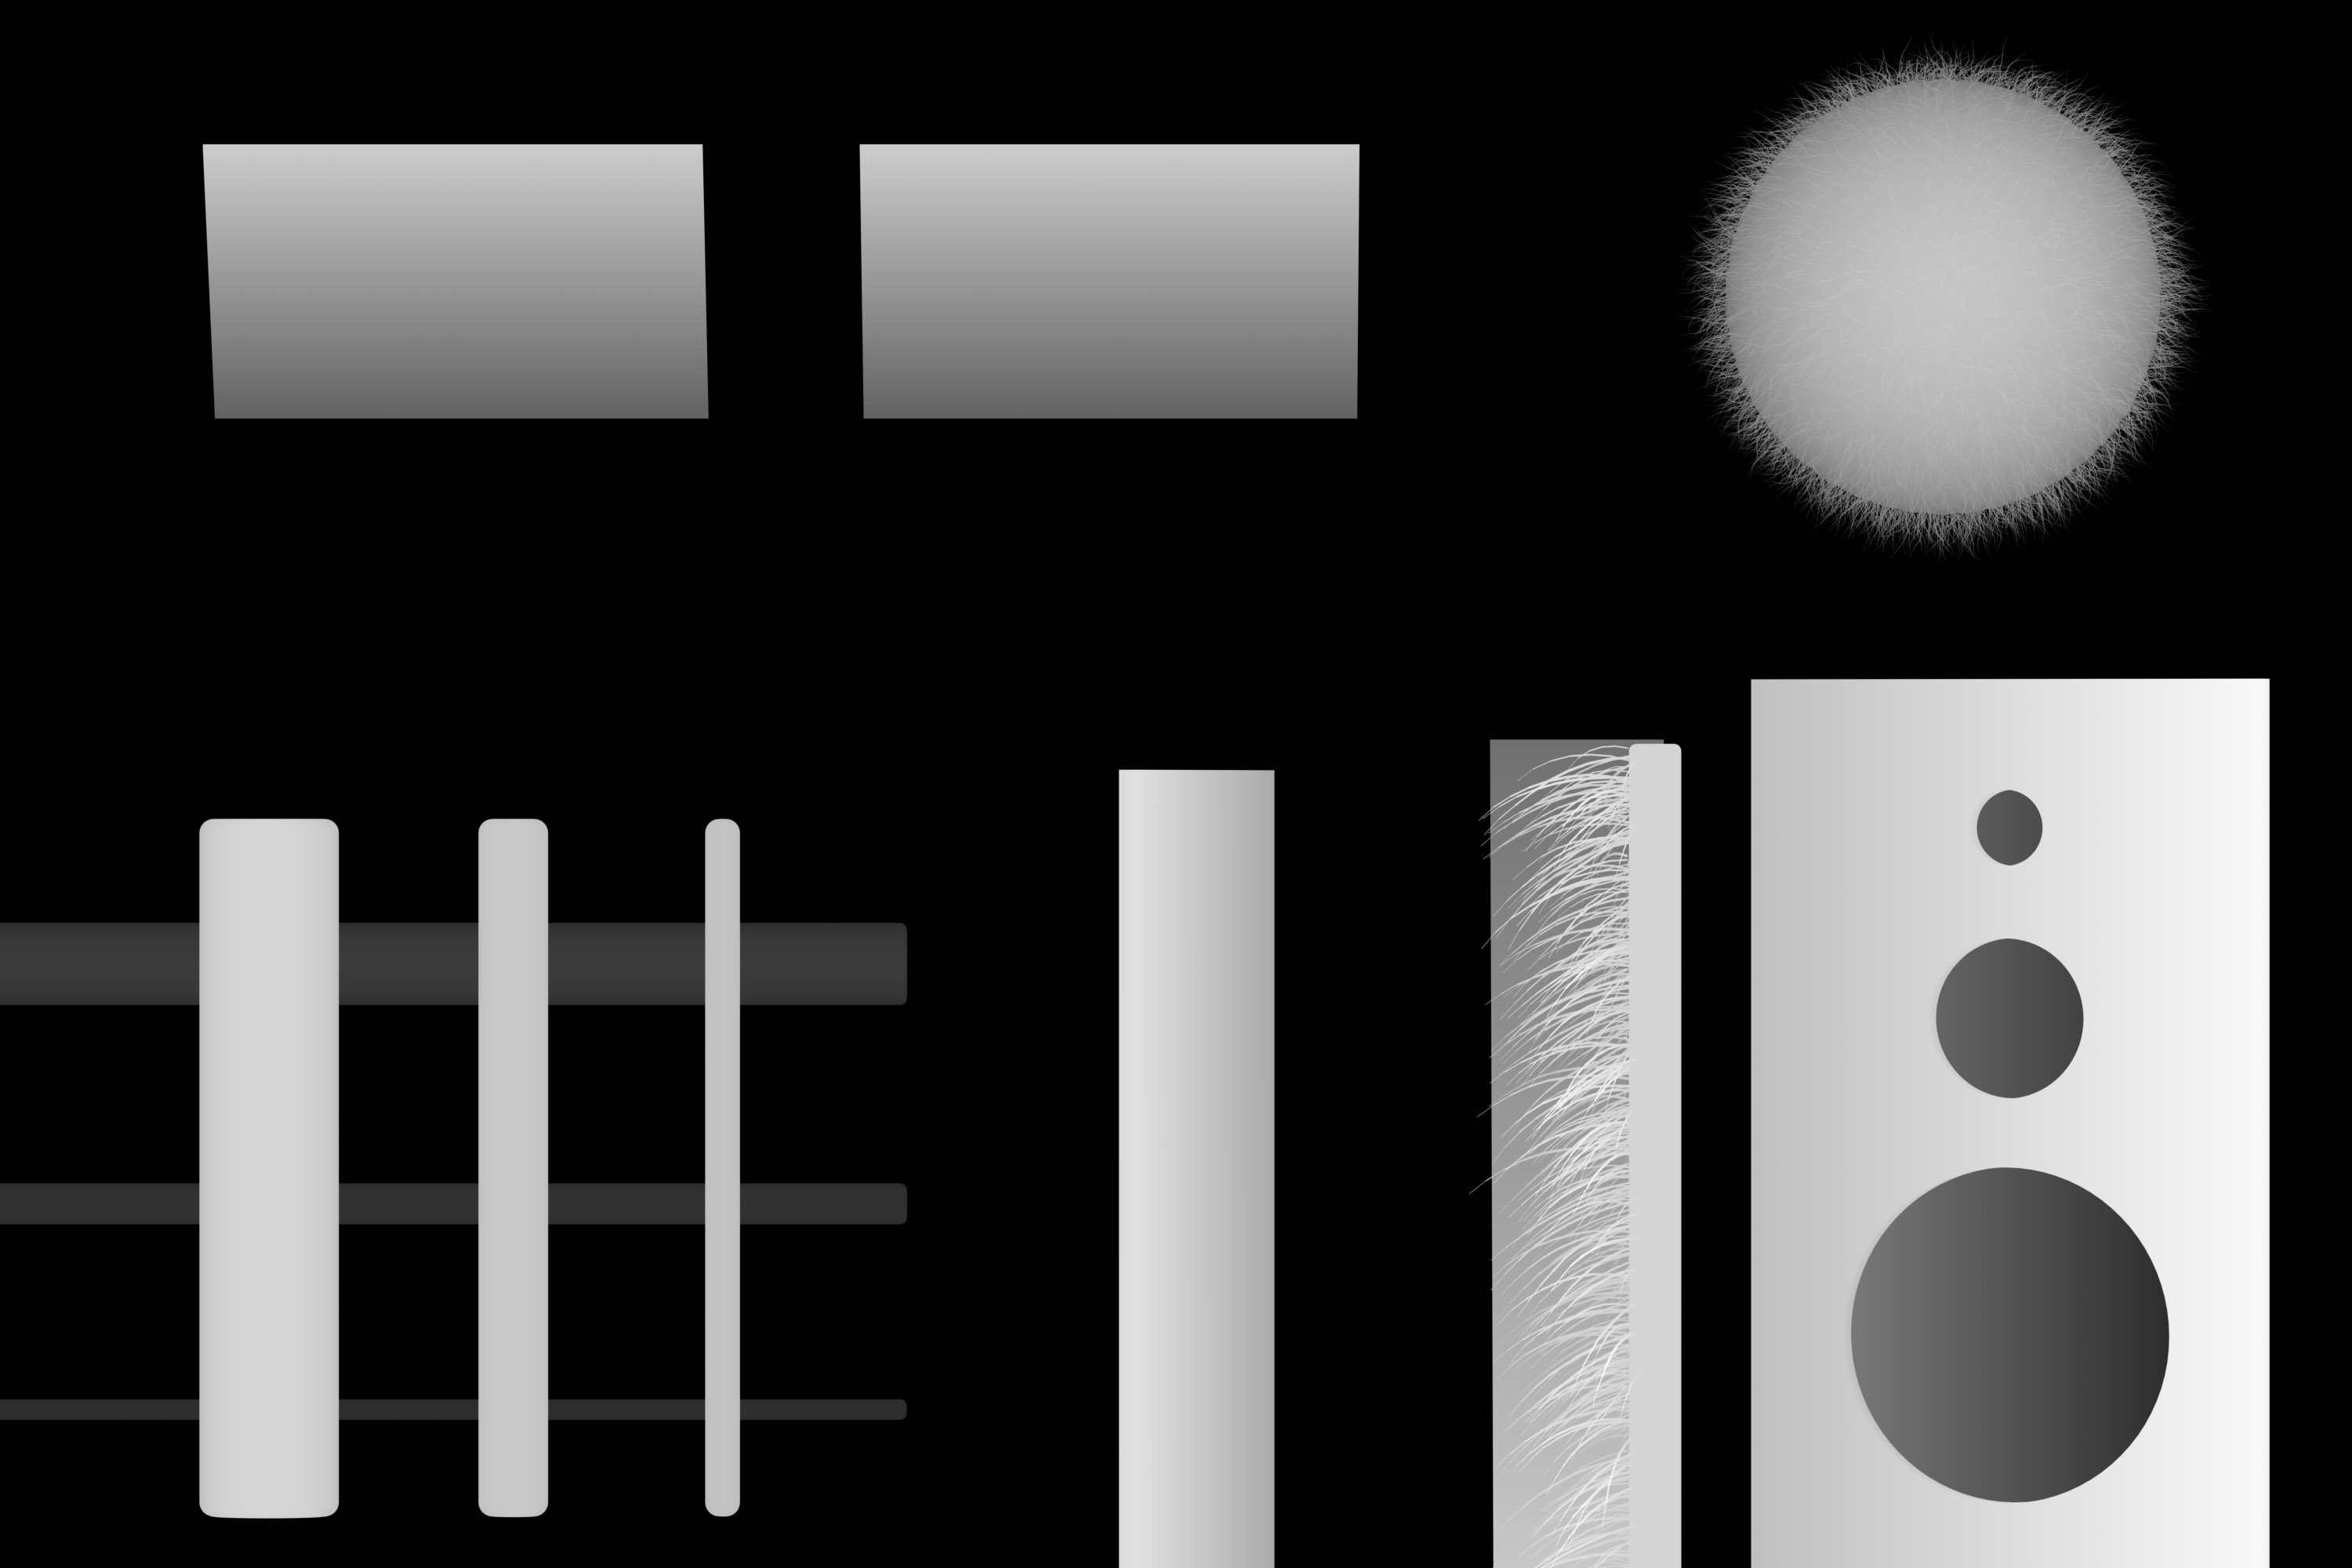
Lets start with the full image:
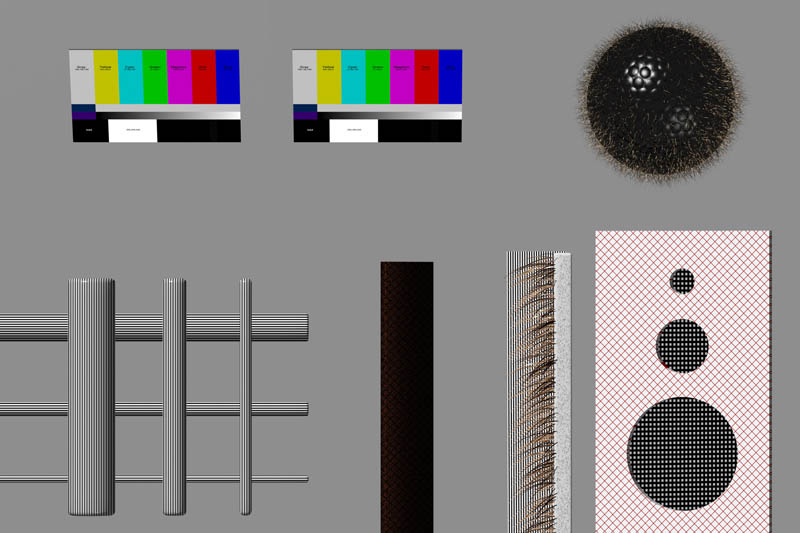
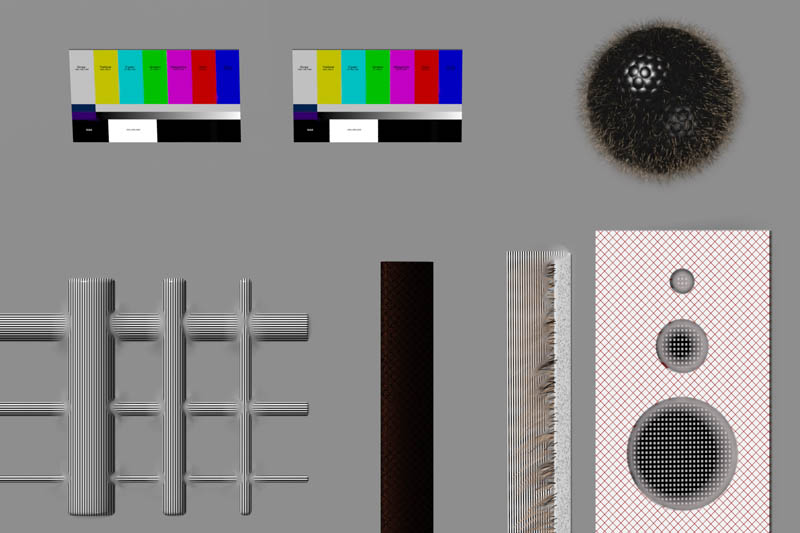

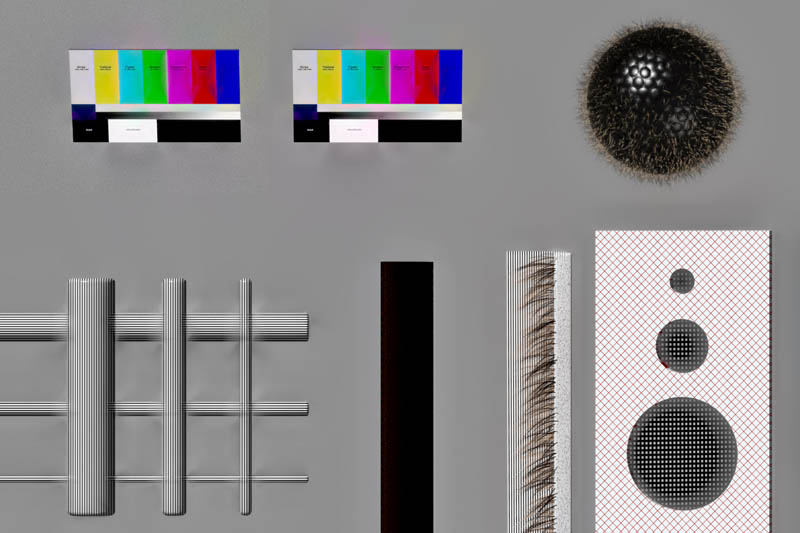

Here is how the full scene looks. Stacking artifacts should be easily noticeable on most objects, but to get a clearer view I have broken down each section into 100% crops.

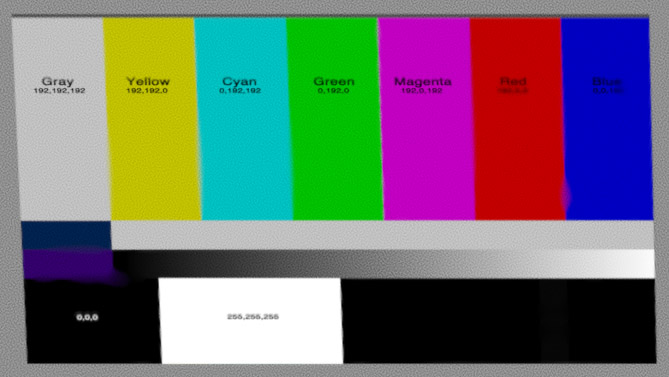

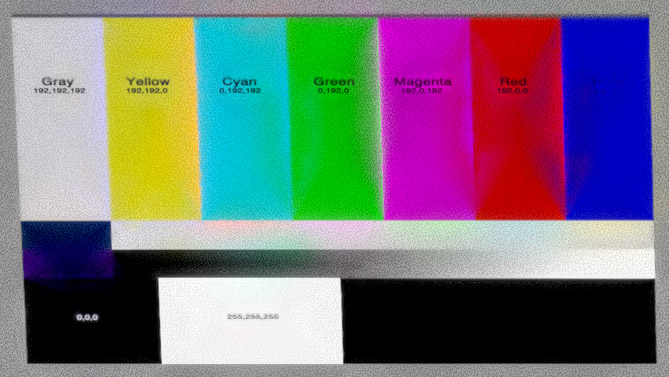
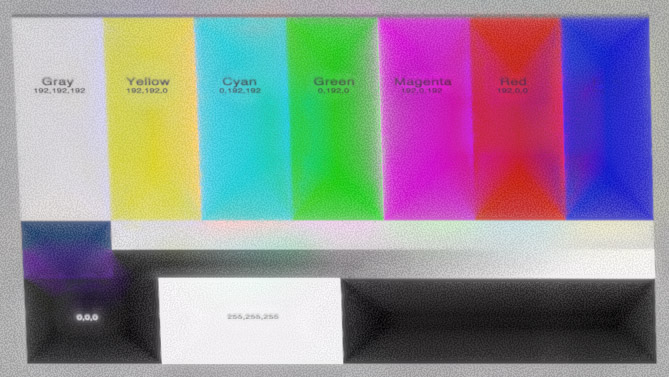
Here is the color panel with noise added in post. The structure of it is a simple plane tilted toward the camera with the top closer to the camera and the bottom further away. This primarily illustrates an increase of noise and contrast in Pmax. Dmap does a very good job keeping all the colors accurate and keeping sharp lines sharp. It is interesting to note the Pmax with RFDR on. I think the pyramid shape maybe an artifact of the very uniform DoF and straight lines or the stacking of 8bit per channel images. Further investigation would be required for me to know for sure.


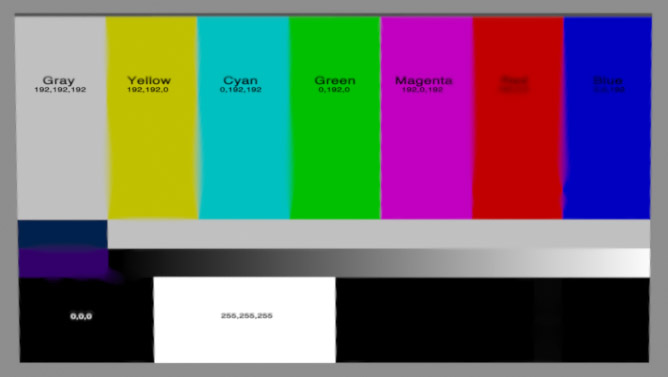
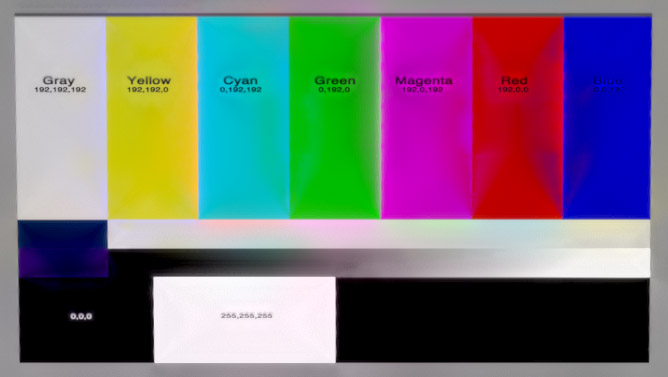

Here is the same color panel but without noise. Again, Dmap does well at keeping colors accurate. All colors for the Dmap image are identical to the render without DoF. Pmax also shows a minor color shift and increase of contrast here. Same artifact with RFDR is observed and still should be ignored for now. I will also note here that the stacking order had a minor impact on the Dmap images here with Back to Front performing slightly better at the same contrast threshold. I have not experimented to see if I can get identical results with front to back using a slightly higher contrast threshold.
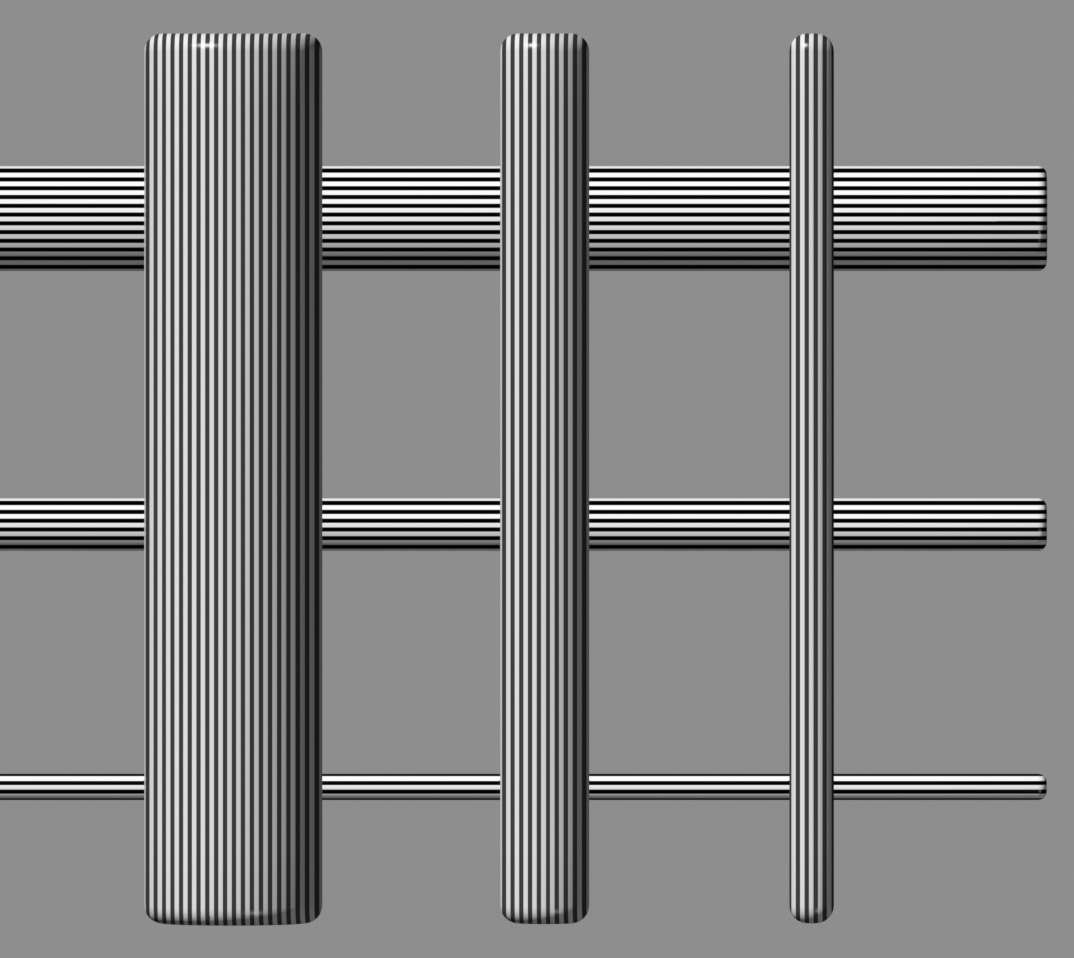
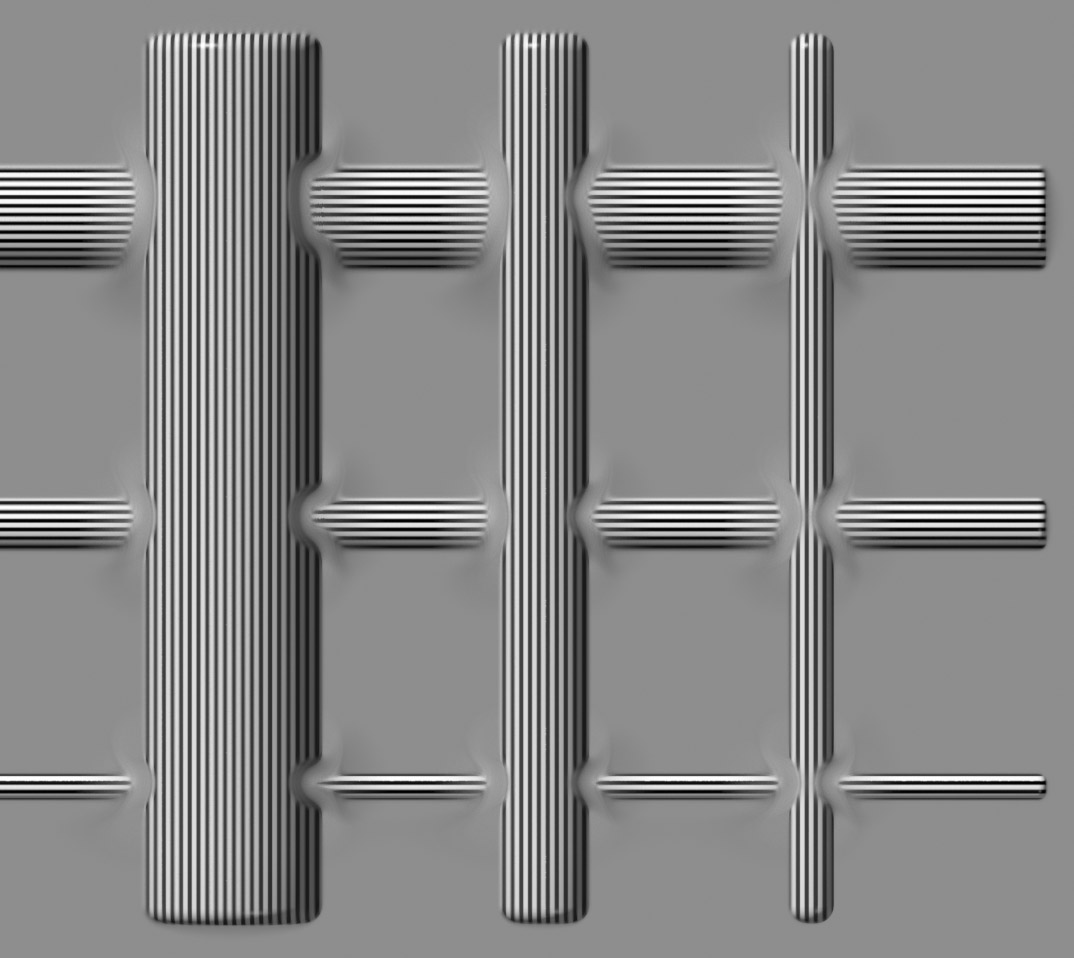

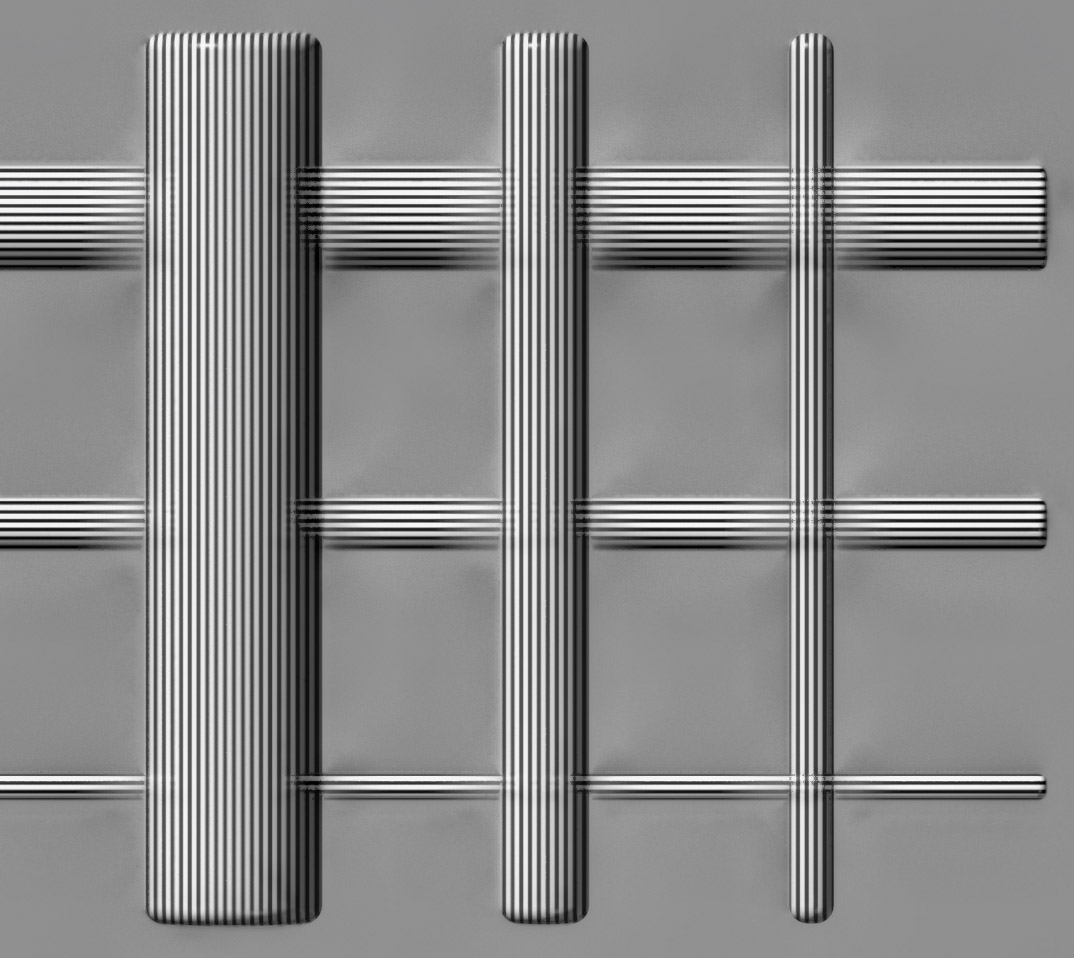
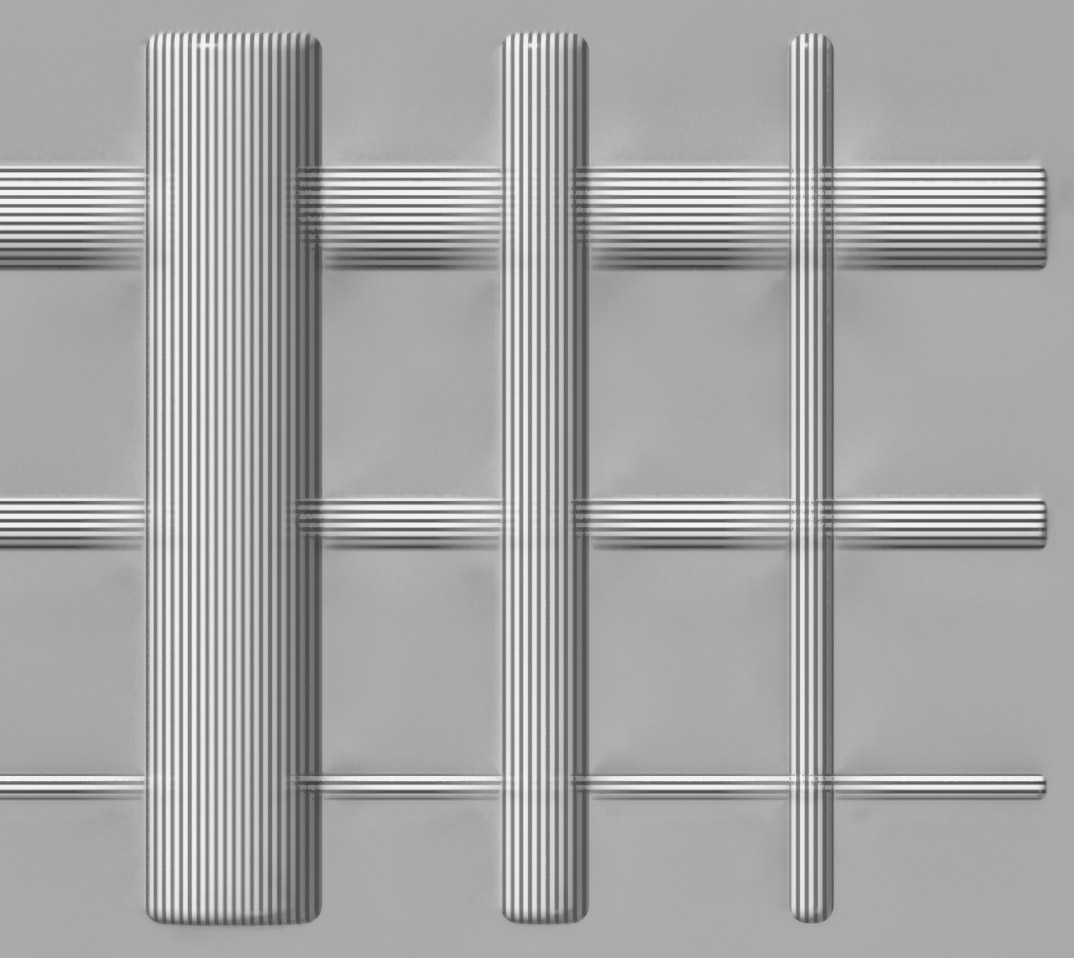
These bars are to help show the transparent foreground effect for Pmax stacking and overlapping halos for Dmap. Both are very clear to see with the two smaller ones going completely though each other in the Pmax image. This effect has been exaggerated by making the vertical foreground bars have less contrast than the horizontal background bars. I found that the effect still happened when both objects had the same contrast but to a lesser degree, and I wished to show the effect more clearly. On the other hand, Dmap halos were almost completely unaffected in my prior tests for both sets of bars having the same contrast. I excluded Dmap Back to Front and Pmax RFDR for being unremarkable.
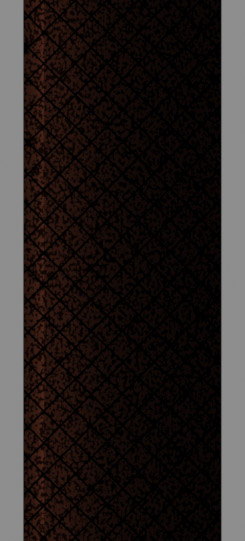
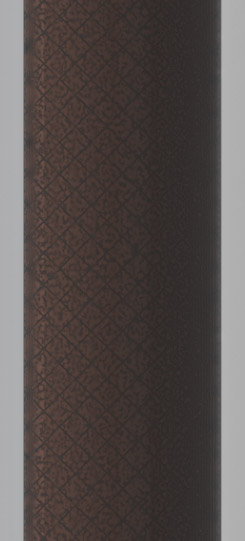
This bar is mean to illustrate the loss of detail in dark, low contrast areas for Dmap and to show an increase of contrast for Pmax. A difference is again observed with Front to Back and Back to Front for Dmap images in the detail it holds. Pmax captures almost all the detail that is in the no DoF render as seen in the RFDR image. RFDR behaves as expected in the main body of the bar.
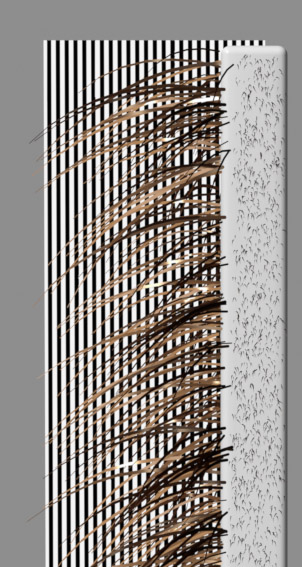
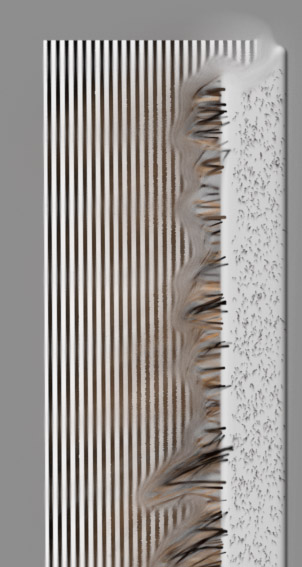

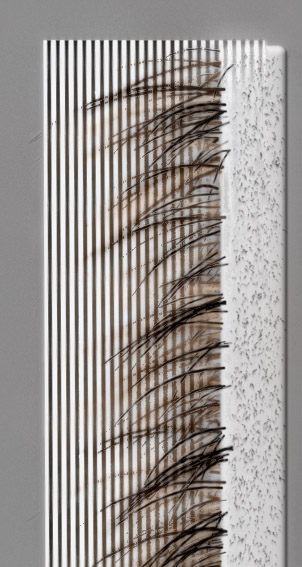
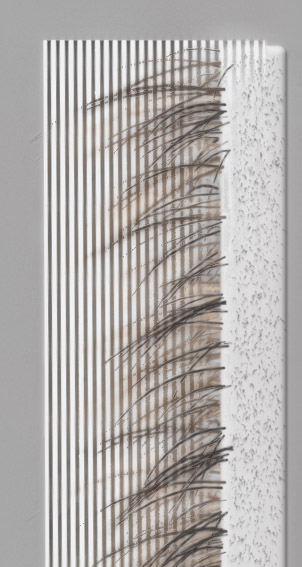
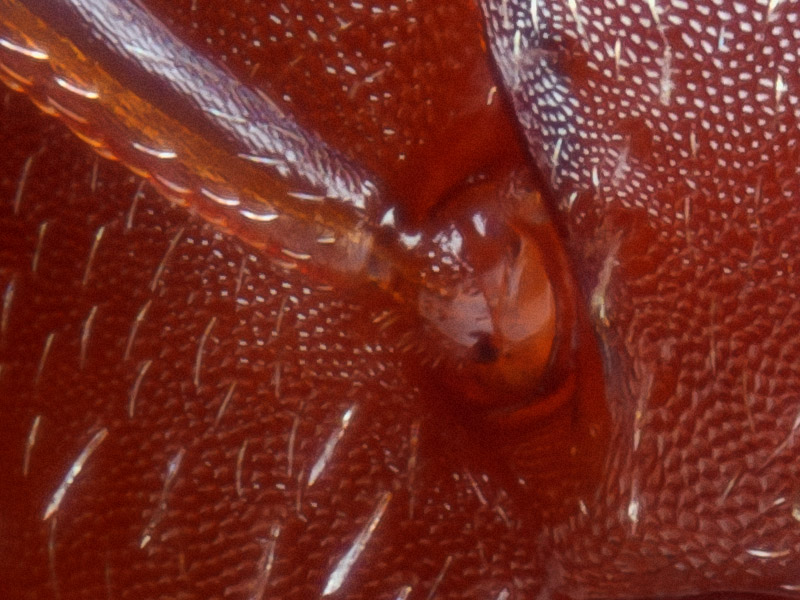
Hairs and the object behind them tend to be the main problem for me and many others. Dmap creates its characteristic halos here and also cuts the hair off in favor the the stronger details of the background. Pmax does better at keeping the hairs close to the full length and does pretty well at keeping detail at the base of the hairs. This is a very challenging test for image stacking which is clear by looking at the image rendered without DoF. Dmap Back to Front and RFDR left out for being unremarkable.
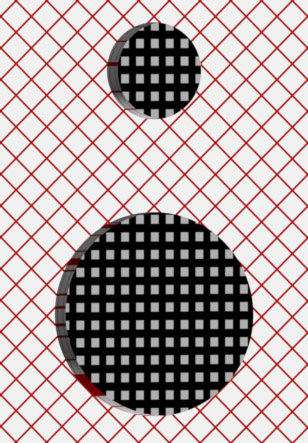
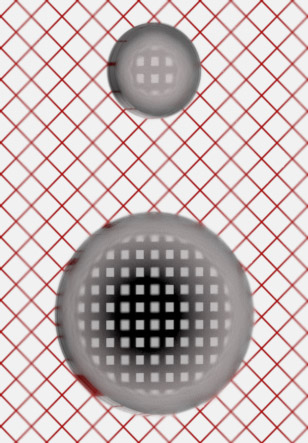

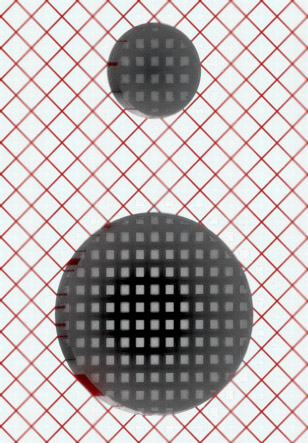
These holes were used to show a foreground object obscuring detail and contrast from an object behind it. This test was not totally successful, though you can see the effect in action in both Pmax and Dmap image. Next time I will need to use objects further away or a smaller aperture to make the effect stronger. The objects are slanted away from each other, which you should be able to deduce in the depth images coming next. Removed Back to Front for being identical to Front to Back.
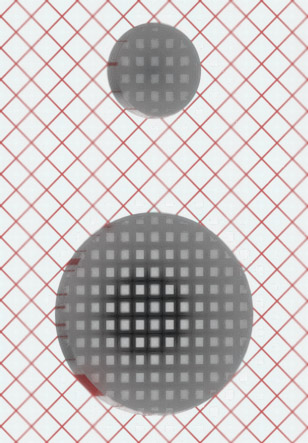
Interestingly here I see some focus banding that was not intentional. I calculated the step size using Rik's DoF spreadsheet found HERE. HERE is an image of the settings used to calculate the step size. I assume that this apparent focus banding comes from a lack of any degradation of the rest of the image from other sources and in the real world the focus banding would not be noticeable.
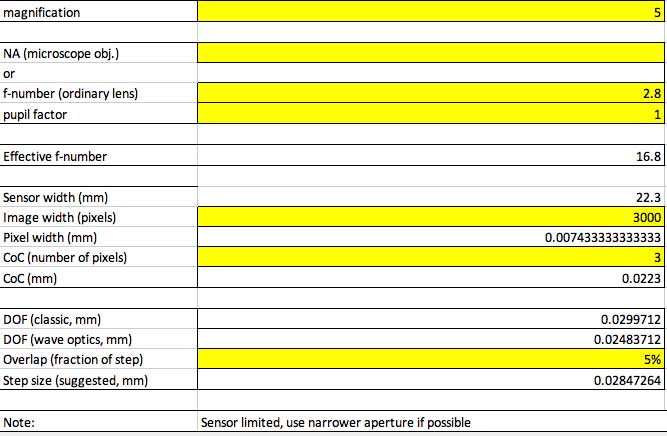
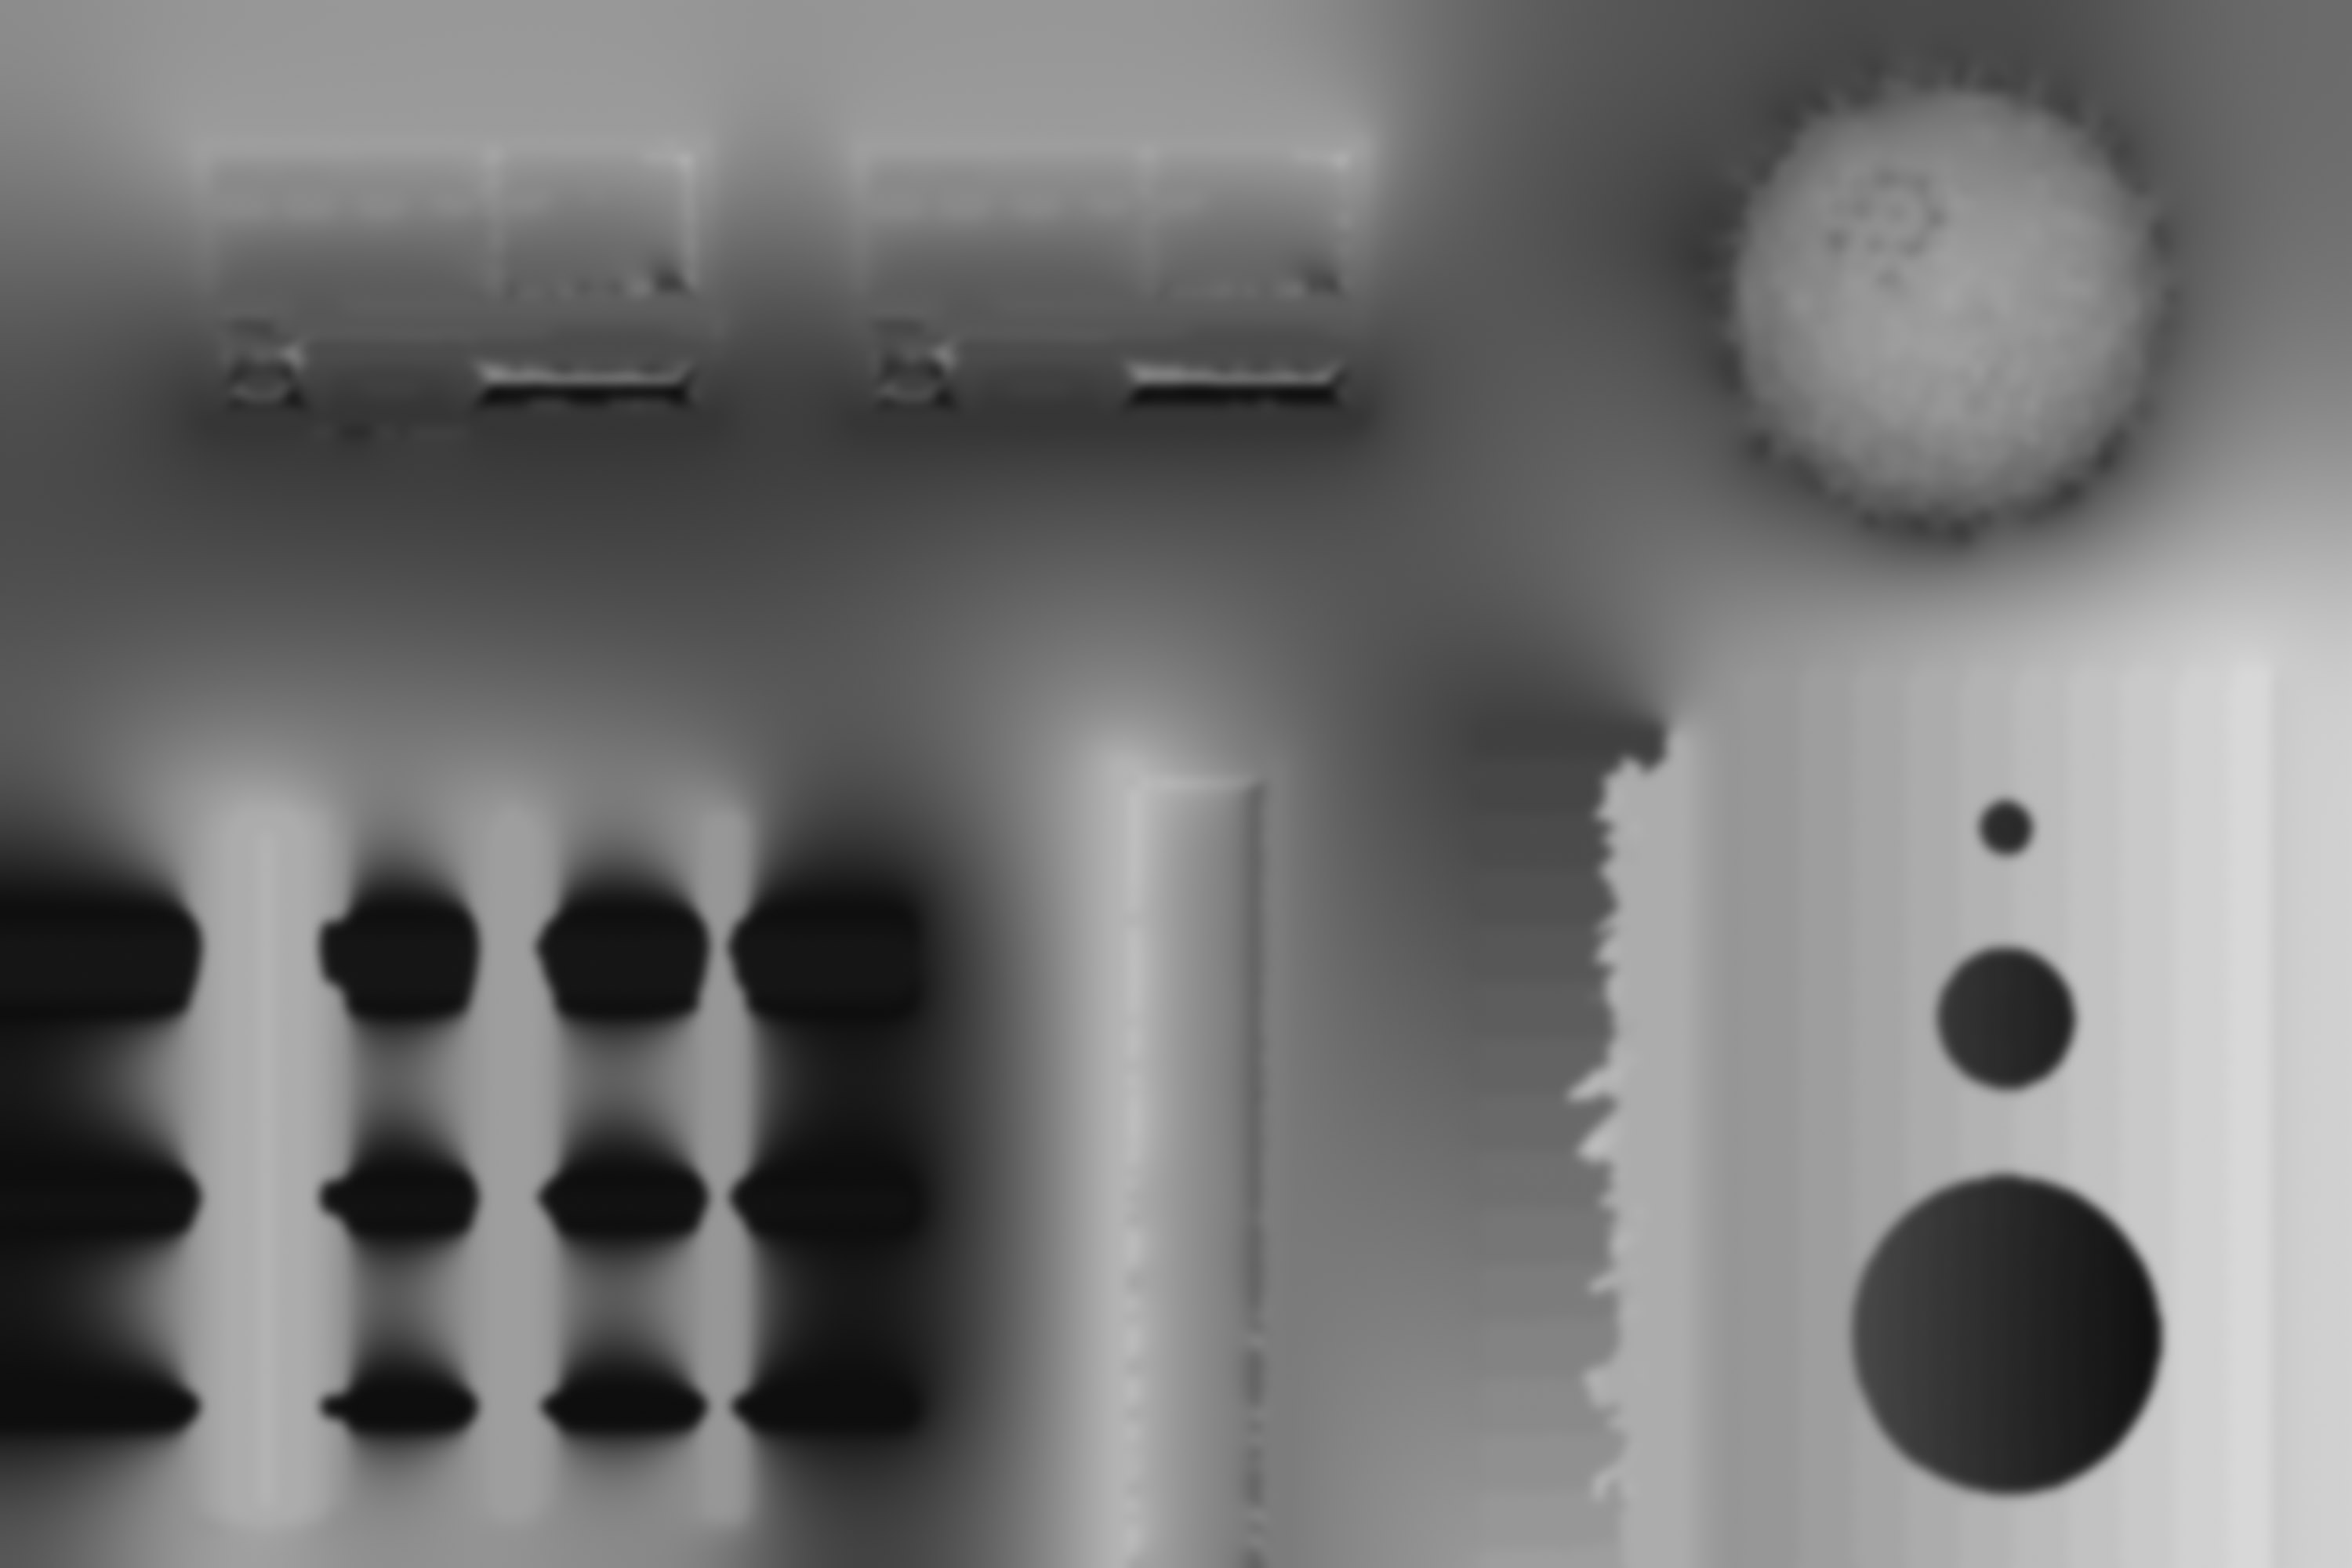
Here is the most informative set of images to me. The first image is a rendered depth map of the scene. Next is the depth map generated by Zerene stacker. The third image is modified to look similar to Zerene's depth map output to make it easier to compare.
Zerene seems to have chose a middle image to construct most of the background from, leaving the background in the depthmap middle grey. Based on the shading I can see that Zerene does a very good job of figuring out where everything is in 3d space to the point where I only see small errors, particularly with the color panels. It is clear that Dmap is finding the depth incorrectly there and therefore selecting the wrong images. I think this would be helped with a stronger or weaker contrast threshold, but it is impractical for me to test various contrast thresholds for these images given the scope. Instead I tried to use a threshold that was approximately 'correct' for the image.
What to take away from this test? I am not sure. For now I consider it more of a curiosity. Several things in mind if I decide to revisit for me to change: large depth(more images), fix the 'holes' object to be more pronounced and varied, adjust transparent foreground artifact test, fix perspective, alignment testing, resolution test for sampling during alignment, and whatever else maybe suggested... That is if I decide it is worth revisiting. For now I think the next test is to see how close one can get to the no DoF image through retouching and substacks.
Overall I think Zerene did quite well despite the fact the intention was to exploit issues with stacking software.
If you had trouble viewing images you can download zips of the images used above here:
Full Sized
Depthmaps with adjustment psd
If you would like the crops from above then:
Color Panel Noise
Color Panel No Noise
Bars
Brown Bar
Hairy Bar
Holes
Hair Ball
Older posts are available in the archive.